Tuesday, December 31, 2013

End of the Year Wrap Up + New Year Resolutions

Happy Holidays, geeks (sorry, that's totally what I'm calling my loyal readership now)!  I hope that you've all been blessed with happiness, health, and some much needed relaxation!  My husband and I celebrated our first Christmas together as a married couple, and it was exactly everything I hoped for.  We have been surrounded by lots of family and friends and are both incredibly grateful for everything we've been given this year.

I wanted to take this opportunity to do a "2013 wrap up" to give you all a peek into what this year has meant for me and my little family.  This year has been a huge milestone in my life; while in the last term in my degree program, my family was hit hard with several health issues and I almost didn't make it to the end of my program because I was spread so thinly.  Add that in with trying to graduate and planning a DIY budgeted wedding, I felt like I'd never make it.  But, with the support of my then-fiance-now-husband, I graduated and received my degree in Computer Information Technology and I married my best friend a week later. We took a wonderful honeymoon to the Caribbean (our first time on vacation just the two of us and my first flight!) and got a chance to explore a bit of Miami.  It was quite a year for us!

I felt so much joy and accomplishment this past year, I don't know how 2014 could be any better.  So, I've come up with a few New Year's Resolutions to keep me motivated!

  1. Earn a 4.0 average in each term this year - After I graduated this past September, I realized that what I earned my degree in wasn't necessarily what I wanted to do.  After doing some research and getting some inspiration from friends, I decided that a degree in graphic design would compliment my already earned degree.  So, I'll be going back to college in January and I'm going to get stellar grades so that I can graduate with distinction.
  2. Implement meal planning - I have read tons and tons of blog posts and Pinterest pins about meal planning and I think I'm finally ready to do this.  I've had to come up with my own methods for this because most things I have found are geared towards families with children, which we don't have just yet.  I've got a plan set out for how to get this done most efficiently, and I think I'll be ready to implement it once the new year begins.  This also ties in with resolution number four.
  3. Use Instagram more often - I love Instagram and think it's a really fun and unique way to share what you're up to with your friends.  I have had an IG account for about a year now, and I haven't used it much; just a few snapshots here or there.  In 2014, I'd like to make more of an effort to use this awesome social network.  Follow me (@codyisageek) to see if I really follow through on this one! :-)
  4. Promote health and wellness - This is something I've been trying to do consistently for a while now. With the new year upon us, I thought this would give me that little push of motivation I need to really bring this into fruition.  I'm going to achieve this goal in several ways including daily exercise, healthy meal choices, vitamin supplements, and meditation.
  5. Stick to a homemaking routine - As you know, I have a cleaning schedule that I stick to in order to keep my home looking fresh in the midst of our busy lives.  In addition to that and my meal planning, I'm going to be working out a routine/schedule for everything having to do with home maintenance.  For example, I'll set aside an hour or two on Sundays to plan out the upcoming week.  I'll choose one day during the last week of every month to plan our budget for the next month and other things like that.  I believe that if I can create a routine that works for me, I'll be more likely to stay on top of things.
  6. Organization - This sort of carries over from my 2013 resolution to become a more organized person.  While I do believe that I achieved this goal, I feel that I still have more work to do in this area.  I'm not sure I'll ever be as organized as I'd like to be, but that won't stop me from trying!
I hope that you all will follow along with me as I try to make these resolutions a reality.  With all this inspiration, I'll have lots of great blog posts to share with you in 2014!  What are your resolutions for the new year?  It's the time for new beginnings and reinventions.  You can do or be anything you want if you just go for it!

Happy New Year!
XO,
C

Wednesday, November 13, 2013

My Weekly Cleaning Schedule

I don't know how some people do it.  Their homes are beautifully clean all of the time.  Even people with kids (which I don't have!) have absolutely spotless homes and still have time for their day to day lives.  Sometimes, I felt like if I were to have my home be that clean, I wouldn't have time to do anything else in my day.  Then, I realized it wasn't about everything all the time, it's about doing a little every day.

After reading up on home management while trying to find a system that works for my little family, I discovered the genius idea of having a weekly cleaning schedule.  I tried a couple different methods at first, finding free printable schedules from various blogs, but they just weren't working for me.  Often times, the schedule accounted for kids (again, not something that I need) and a much larger home than our small apartment.  So, back to the drawing board I went.  I came up with my very own schedule, tailored to fit my needs, but general enough so that anyone could use the system.

Some of my homemade all-natural cleaners that I use
My cleaning schedule is based on a simple rule: do a little bit every day.  Each day has its own room to be tackled, a load of laundry to be done, and there is a small list of daily tasks.  I've found that if I stick by this schedule, cleaning takes almost no time at all out of my day - maybe an hour at the most.  The beauty of this system is that, if it is truly followed, keeping up with housework is incredibly easy.

Here's how I break down my week in cleaning:
  • Monday - Kitchen - Laundry: clothes
  • Tuesday - Bathroom - Laundry: Towels
  • Wednesday - Living Room - Laundry: Clothes
  • Thursday - Bedroom(s) - Laundry: Bedding
One of my favorite parts of my schedule is the laundry.  I am not at all a fan of doing laundry (especially when I don't have a washer/dryer in my apartment and have to walk all the way to a different building to get it done).  But, in keeping with my "a little bit every day" mantra, doing one or two (never more) loads four days a week keeps dirty laundry at bay and makes it easier to lug the laundry across the parking lot!  If there needs to be more laundry done, I'll do it on the weekend when there is less "other" housework to be done, but that doesn't happen often.

As I said before, our home is small so my list is not long and I have the three day weekend to relax and spend time with my husband and friends.  Of course, daily chores are still completed on the weekend, but there is no "intensive" cleaning during the weekend (which my husband appreciates more than I do, I think).  It's nice to have a clean home on the weekends when you want to have friends or family over - there's no frantic 10-minutes-before-they-get-here cleaning.

My daily chores are very simple and take almost no time from my day: spot sweep/vacuum, wash dishes, make the bed, and tidy up (which is really just decluttering anything that has been left sitting out and not put where it belongs).  If you keep up on your weekly cleaning chores, the daily tasks are a breeze.

My cleaning schedule printable in my home management binder
My cleaning schedule, as well as my all-natural cleaning product recipes, are part of my home management binder which I plan on sharing with you all very soon!  Do you have a cleaning schedule or do you just clean as you go?  What kind of cleaning "system" do you use?

xo,
C

Sunday, October 27, 2013

Bedroom Makeover and DIY Yarn Wall Art


After getting home from our honeymoon, I spent a couple days cleaning up and reorganizing everything in our bedroom.  It makes me feel so much better once everything is in it's place - clutter and messes give me terrible anxiety and I can't get any work done until my space is tidy!  Before the wedding, our bedroom was packed full of wedding stuff (decorations and various odds and ends), and with it all gone I could finally get our bedroom back to looking like a bedroom rather than a storage space!

Matt and I have come a long way with our home.  If you would have seen it a couple years ago, you would barely even know anyone lived there.  Our living room was especially barren - no couches, no TV, just a stereo, a table, and our fish tank.  It didn't matter to us as much when we were younger and weren't really spending much time at home.  But, now that we're older and are busy, busy, busy all the time we really wanted to come home to a nice place and be able to relax.  So, being the geeks that we are, we furnished our living room, complete with a 3D Smart TV, 3D Blu-Ray Player, and an Xbox.  Now, we have a space to come home and just relax (and by relax I mean play video games).  Over the past couple of years, I've been working on decorating our then-bare walls and shelves.

Now, to the point of all this.  I had spent so much time focusing on the "public" spaces of our home (Living room, kitchen, bathroom, etc.) that I had completely neglected our bedroom.  Currently due to lack of space, our bedroom also serves as our "office" area.  Both of our computers and desks reside in our bedroom.  Since "upgrading" our living room, we have not been spending our time in our room at our desks surfing the web or playing games as we had in the past, which resulted in all the other rooms in the apartment being beautifully decorated, but the bedroom remaining to be boring and blah.


Well, I'd had enough of boring and blah!  I recently found something called yarn wall art on Pinterest and I loved it.  What a creative way of adding a little something to the plain walls of the bedroom!  The idea is simple:  decide on what image you want on the wall (I went with a saying, but you could do tons of other things besides letters!), add some nails and yarn, and BOOM - creative decor that everyone will love and ask you "where did you come up with this?!"

DIY Yarn Wall Art
What you'll need:
  • Nails (do not underestimate the amount of nails you will need - I bought twice as much as I thought I would need and used all of them).
  • A hammer
  • Lots of yarn in various colors (you will need a lot of yarn, depending on what image you're creating).
  • Either a printer or projector to put the image on the wall
  • Painter's tape (if using a paper printed image - or any other "less sticky" tape that won't pull the paint off your walls if you need to readjust).
I began by choosing the phrase "Sweet Dreams" for our bedroom wall (appropriate, right?) and also choosing the font that I liked best (I picked Impact to make the letters stand out boldly).  I printed the letters out with one letter per page in order to get them to be the size that I wanted.


Next, along with the help of my wonderfully handy husband, I measured out the spot I wanted the image to appear.  He helped me a TON with this part of the project.  Here are some tips on getting the image to be centered:
  • Take lots of measurements - measure the total length of the wall as well as the total length of the image will be placing on it.
  • Have a calculator handy - Calculate the length of half the wall.  Measure from one corner and make a mark at the length you calculated.  Do the same from the other corner.  The marks may not match up exactly, and that's okay.  The center of the two marks is the true center of the wall.  Do the same to find the center of the image.
  • Match up the center points of the wall and image - This was not as easy for my project because the center of my image fell somewhere in the spacing between the two words.  Make sure you have reference points to work from (for example, 10 inches from the center should match up with a certain letter/point on the image).
  • Tape is your friend - If you've printed the image onto paper, use painter's tape to tack the paper to the wall.  Painter's tape is easy to remove and re-stick where you need it.
  • Use a level -  If you want your image to be properly leveled, you will need a level.  There are apps that are available on both iOS and Android that can do this for you.  The one I used is called iHandy Level Free (you guessed it - it's free!).
  • Have someone else eyeballing it - instead of running back and forth from the chair I was standing on to the other side of the room to take a look at the whole image, I had Matt stand on the other side of the room and help me in making sure it looked just right.
After getting the image set up where you'd like it, begin placing the nails.  My best tip this step are to put one nail at each point where the image's outline curves or takes a turn (corners for example). 


As I said before, and as you can now see from my photo, you will use tons of nails, especially on "curvier" letters/images (like the "s" above).  For a finished product that is closer to the original image and less blocky or angular, you will want to place several nails closer together in order to direct the yarn.  We're working with straight lines here, people.  Just use your judgement - you don't want them too close together either or you'll lose the look of the yarn to the nail-heads.  Make sure you have plenty of nail sticking out of the wall as well.  I recommend about an inch of room, especially if you want your image to appear "fuller," as you'll need to wrap yarn around the nail several times.


After setting the nails in your desired pattern, take down the paper used as the template.  Make sure to get any little scraps left behind and clean up any pencil markings you made on the wall when placing the template.  Once the template is gone, it's much harder to visualize the image that you're trying to create.  This is one reason it would be easier with a projector as you could keep the image on the wall as you string the yarn.  Unfortunately, I don't have a projector so I had to go the old fashioned route!
 

Once the wall is cleaned up, the fun begins!  Tie the end of the yarn to one of the nails and begin twisting and wrapping the yarn around the nails.  It's very important to remember the outlines of the image while doing this step so that your yarn doesn't cross outside of the image to reach another nail.  To match the decor of our bedroom, I knew that I wanted my letters to have a fuller ivory area on the inside with a black outline and some lighter crossings of black on top of the ivory.  I started by criss-crossing ivory yarn all over the inside of each letter, filling in the image.  Once I was satisfied,  I cut the yarn with a good amount of room on the end to work with and tied the end around a nail, similarly to what I did to start the design.  Next, I started a black yarn and strung the yarn around the edges of the letter to give it an outline and then did a few crosses with the black on the inside of the letter.  I cut and tied off the end just as I did with the ivory.


Rinse and repeat on each letter or until your image is to your satisfaction.  Be creative!  Use multiple colors, designs, or textures!  I'd love to see what you come up with!  I'm hoping to continue my bedroom makeover by doing a few more DIY projects.  I want to do a rearrangement of the furniture and make a big upholstered headboard to go beneath the yarn art!  Also would like to paint the dresser that you can see peeking up from the right corner of the above photo.  I'll be sure to post more on my bedroom makeover adventure as it unfolds!

xo,
C

Monday, July 22, 2013

Wedding on a Budget: Painted Bottle Centerpieces


I swear, Matt and I should just change the theme of our wedding from "country chic" to "Pinterest," because that is where ALL of my ideas have come from.  I knew from the get-go that I wanted to have a DIY wedding for a couple different reasons.  First, because it would be much cheaper than buying and/or renting decor.  Secondly, because I just love doing crafty projects and this gives me a really good excuse to do them!  And finally, because (as I've said many times before) I can make my wedding exactly what I want it to be.

My first project that I took on was possibly the simplest: the centerpieces.  I found a photo of glass bottles that had been painted - on the inside.  I loved the look.  It was clean and simple with a pop of color.  And, with the paint on the inside of the bottle instead of the outside, it looks much more elegant and less "crafty."  You'll be much less likely to scratch or chip the paint when it is on the inside of the bottle.  But, be careful, because the paint is water-based, you cannot put flowers directly into the bottle (unless you want the paint to dissolve away!).  If you'd like to fill the jars/bottles with flowers, I'd recommend putting a small cup of water into the jar/bottle first so that the water doesn't touch the paint.

I enlisted the help of my friends and family members on this one.  I sent out a request via Facebook that all my friends and family members would save any clear glass jars or bottles that they may have and give them to me to be "recycled."  As a result of this request, I got tons of unique glass items of all shapes and sizes - liquor bottles, jelly jars, pickle jars, mason jars, beer bottles, salsa jars, and many many more.  This made my inner environmentalist feel really good about keeping these items out of the landfills!

For this project you will need:
  • acrylic paint - use a few different colors or even mix a couple colors in one jar and make it marbled/swirled.
  • something for the paint to drip into while drying (I used plastic cups and an empty pizza box!)
  • CLEAN glass bottles and/or jars of all shapes and sizes.
  • Patience!!
  • Small sized paintbrush (that could fit inside the top of the jar/bottle)
You want to start off with clean, dry glassware.  Dirty or wet glass will not hold the paint and it will come right off.  Pour a bit of paint into the jar/bottle being careful to not get it everywhere!  Depending on the size of of the jar, you'll want to have about 1/2 an inch of paint in the bottom for a medium sized jar.  Cover all of the inside with paint by slowly tilting the jar around until all clear sides are covered (this is where the patience comes in!).  Once most of the jar has been covered, use the small paintbrush to touch up any parts that are missing color, especially right inside the mouth/neck of the container.  Leave the bottle/jar to dry upside down until you think the majority of the extra paint has dripped out (I left mine overnight).  After most of the excess paint has dripped out, turn the bottle right side up and let dry completely.  I'd recommend leaving them overnight once more.  Once dry you can clean up the paint around the mouth of the container by simply scratching it off with your fingernail.

Because I'm only using these items for a wedding and not as part of permanent home decor, I did not use enamel paint for glass.  The enamel paint is more "permanent" on glass and is harder to chip away once you've set it.  Because the enamel paint is thicker, I had a harder time getting it to swirl around in the bottle.  Because of this, I used regular acrylic paint as I'm not worried about the paint being "permanent" - it only needs to hold until the wedding is over!

As I said, I'm going to be using these bottles as part of the centerpieces for the reception.  They'll be grouped together with some "slices" of wood, somewhat like the photo below (photo credit: here).  I can't wait to show you all the finished product!  Be sure to check back in a couple months to see the photos of the wedding decorations in all their glory!


A really fun thing to do with this project is add two or three different colors to the jars.  To do this, add paint in a few different colors to the jar and swirl them around to create a marbling effect.  My grandmother and I did this with clear Christmas ball ornaments when I was a kid and they were gorgeous!

Happy painting!
-C

Friday, July 19, 2013

Keeping Life Organized: Family Media Database

I've got a ton of books and movies, and my friends and family know it.  They love to come and browse the "library" and borrow a title or two every now and then.  I needed a simple and easy way to keep track of who I've loaned items out to and to just keep a visual inventory of what I do have.

Keep Your Life Organized: Family Media Database

My inner geek came out and I had a marvelous idea: a family media database.  Microsoft Access is a database management program that uses a graphical user interface to make things a bit easier on the user.  Even less tech savvy people can use this program and make their own database.  I had the advantage of taking a college course on Access (as it is a requirement for my major), but Microsoft has some helpful training videos and articles for beginners readily available here (Link applies to the new 2013 edition of Access).

In this post, I'll show you what I've done to create my personalized media database.  I've taken screen snippets from my database to show what I've done.


Here, you can see the tables I've created that hold the records for the database.  Creating the links between related tables is very important in order to create queries to customize the information you see.  Be sure to create relationships for the tables that need them!


For each book in the books table, I enter a unique ID number beginning with B (for book, obviously!) and the book's title, author, and genre.  I also indicate what format the book is in (paperback, hardcover, or e-book), whether it is part of a series, and the series name (if applicable).


The movies table is much like the books table.  Each movie has its own unique ID number beginning with M (for movie - I'm so clever!), the movie's title, year made, genre, and rating.  I also indicate the format the movie is in (DVD, Blu-Ray, or Digital), any distinctive notes about the movie, and whether it is a 3D movie or not.

As I mentioned earlier, relationships are very important in my media database.  Without the relationship links, these queries I have created wouldn't work.  I'm not going to go into how to create the queries (you can find that information yourself in the training documents I mentioned above) but I will tell you why to create the queries.  Each query is run when you open it, meaning any records that apply to the query will be shown, even if they have been added since you created the query.  I've set up a few queries to show me different sets of information: which 3D movies we have, which movies are Blu-Ray, which movies are on DVD, which books are parts of a series, list of any duplicate movies (owned in two different formats), and which books or movies have been loaned out.

This database makes keeping track of things so much easier.  I can find the information I'm looking for with the click of a mouse rather than searching through shelves and boxes.  You don't have to stop with media, you can keep a database of whatever information you'd like to keep organized - use your imagination!

Let me know what kinds of things you use a personal database for!

xo,
C


Tuesday, July 16, 2013

Keeping Life Organized: Going Paperless

Keep Your Life Organized:
Going Paperless


What is the key to creating a more organized space?  Having less stuff to organize.  One of the things I hate the most is paper clutter.  This is for two reasons.  First, because it seems that the inflow of random, needless papers is never ending.  Secondly, it is such a waste.  I'm not an environmental activist or anything, but I just can't see the point in the stacks and stacks of wasted papers that people have in their homes that just get thrown into the trash and take up space in landfills.


There are many different levels of "paperless" for your home.  You may decide you'd just like to do one or two of the things I'll present to you today and that's okay!  Make your choices based on the needs of your family and whatever makes you happy!

I'd like to share some tips for going paperless at home.  Of course, it's almost impossible to be completely paper-free, but you can greatly reduce the amount of paper your family is taking in and getting rid of.
Get a scanner & learn to love the cloud
This will be the best thing you've ever done for your home.  With a scanner, any important documents can be scanned into your computer and saved, reducing the amount of papers you actually need to keep in your home. The only papers I keep are things I definitely need original hard copies of (things with official seals or stamps are examples of things you should keep) and they go straight into a filing cabinet.
By storing the documents electronically, you also gain the ability to access them from anywhere with cloud storage (I like Google Drive or Microsoft SkyDrive).  By keeping copies of your documents stored online, you and your family can gain access to files from home, work, or wherever you need - which is a huge advantage over keeping paper records.  Just be sure to back up all your information regularly.  You never know when a hard drive might fail and once it's gone, it's gone for good.  I recommend backing up your documents to several different places, including to online cloud storage (while it's not likely to happen, what would you do if your internal and external hard drives failed at the same time?!).  There are several sites that can store your backed up files in "the cloud" for a small fee (backup files are much larger than the singular documents you store on your personal cloud storage, hence the need for a different service to store them).
As you begin to scan in the documents you'd like to be kept electronically, you will notice that you're getting rid of a lot of paper, which may feel like defeating the purpose of "going paperless" but, once you've purged yourself of the papers you have and reduce the amount of paper you're taking in, you'll really notice a difference in the amount of trash you're throwing away.  Take recycling into consideration while making the transition to paperless - any papers that can be recycled should be, but be certain to shred any sensitive information before discarding it.
Stop all the junk mail
Here are a few facts I've recently discovered via 41pounds.org, a website devoted to stopping the impact of junk mail:
  • More than 100 million trees are destroyed each year to produce junk mail.
  • On average, an adult can expect to receive 41 pounds of junk mail every year.  44% of this will end up in the landfill without even being opened.
  • The creation and shipping of junk mail produces more greenhouse gas emissions than 9 million cars annually.
Or, if saving the planet doesn't interest you as much, these facts might make you take a second to think about it:
  • $320 million of the taxes that you pay are used to dispose of junk mail each year
  • The transportation of junk mail alone costs $550 million each year.
  • Companies are buying and selling your name and address for 3 to 20 cents each time it is sold.
There are several resources you can use to reduce the amount of junk mail you receive in your mailbox everyday.  First, you should take a minute to consider your subscriptions.  Many magazines now offer electronic versions of their issues that can be read on mobile devices such as tablets or readers.  Often times these electronic subscriptions cost less than their paper counterparts and reduce the amount of paper you will be getting rid of.  Secondly, there are several services that are free to use which can help stop the unwanted junk from ending up in your mailbox.  OptOutPrescreen will help stop all the "you've already been approved!" credit card offers.  Very much like the "do not call" list that helps end annoying telemarketing calls, DirectMail allows you to sign up for their "do not mail" list, which will help stop unwanted advertisements being delivered to your mailbox.  CatalogChoice will help you stop any catalogs that you are uninterested in or would never buy from. DMAchoice allows you to set preferences so that you continue to receive mail that you want and you stop getting mail that you aren't interested in.
By reducing the amount of junk coming in, you're reducing the amount of junk going out.


Sign up for electronic billing
Stopping junk mail is only half the battle.  What about the mail that you actually do want or need to read, such as monthly bills?  None of my bills come in the mail.  Each month, I'll receive an email from each my service providers letting me know that my statement for the month is available.  I'm then able to sign in on their respective websites to view my bill in PDF format.  I can then choose to print the bill if I'd like (which I do for my Home Management Binder).  Even with the paper being used to print the bill, I'm still reducing by eliminating the extra leaflets, return envelopes, and extra pages used by the company when sending paper bills.  With bills that contain multiple pages, I only print the page that has the date and amount due.  And, since I'm printing with my own paper and ink, it is more likely that the document is recyclable (a lot of junk mail isn't able to be recycled due to the amount of heavy metal that is sometimes used in the ink).
When the bill is ready to be paid, instead of sending a check (more paper!), most companies allow you to pay online or over the phone.  Often times you can even set up automatic bill paying - the amount due will come out of your account automatically without you having to do anything.  This is convenient for forgetful people (as I can sometimes be!) and helps keep bills paid on time and is eco-friendly.


Rethink how you use paper products
We use paper every day, even in places we may not realize or even think about.  Every greeting card and letter uses unnecessary paper.  Even simple tasks such as writing a grocery list can use tons of paper over time.  To save paper, try sending electronic greeting cards.  There are several places online that offer such cards for free or a small fee.  If you send out newsletters to friends and family for holidays, as so many people do with Christmas cards, publish it to a PDF file and send it in an email.  While some people may think that email is "impersonal," just remind them why you're doing it this way - you're doing them a favor by not sending a sheet of paper that will just be discarded anyway.  Avoid using disposable plates, bowls, and cups.  Cut up an old towel to be used as rags rather than using paper towels.  You can reduce your paper use in so many small ways - you just have to think about what you're currently doing and ways you can change it!

Make a digital signature
Some digital documents you receive may require your signature before you send them away.  Usually, you'd go about this by printing the document and then signing it.  Then, you'd either have to scan the document back into the computer and send it off, or stuff it into an envelope, stamp it, and put it in the mail.  Both of these options waste paper.  Instead, sign a piece of paper with a black ink pen.  Scan your signature and save it to your computer.  The next time you need to sign a document, there's no need to print: just insert your saved signature and hit send!


Have any other tips on going paperless in your home?  Leave a comment and let me know!

Stay green!
-C

Thursday, July 4, 2013

Independence Day Festivities


Independence Day is one of my favorite holidays.  I know, I say that about almost every holiday.  But, really, what's not to love about barbecues, fireworks, and Lee Greenwood's God Bless the USA?  Here in Lincoln, we have an all-day celebration that has recently been dubbed the Uncle Sam Jam.  Held at a public park/lake, there are all sorts of fun activities all day for families to take part in.  Personally, I have never joined in the public celebration, but I love to watch the fireworks show they put on at the end of the night.

For the second year in a row, Matt and I hosted a get-together for our friends and family at our teeny tiny apartment.  Since our place is only about a mile from where the Uncle Sam Jam is held, it makes sense for everyone to gather here.  Indoor space is an issue with our apartment, which is why the 4th of July is the perfect chance for us to have a shindig - most everyone can spend their time outdoors.  There is a big field with a couple cottonwood trees right outside our front door.  We used the big outdoor space for grilling, for the kids to play, to hang out, and light a few fireworks. When the fireworks show was about to start, we all picked up our lawn chairs and blankets and walked to a big parking lot across the street (behind another apartment complex) where we had a perfect view of the show.  It was a perfect evening with no clouds and it wasn't too hot.  I couldn't have asked for a better night for a fireworks show.


I made so much yummy food for our barbecue.  As usual, I will share photos for my favorite creations!  All of these recipes were taken from a Betty Crocker cookbook I picked up at the grocery store called Backyard Parties & Picnics.  It had a red, white, and blue cupcake on the cover and I was sold (I'm such a sucker for patriotic looking things around this time of year - I bought Bomb Pops on the same grocery store trip).

Click the title for the recipe!
Just like it sounds, this dish gets its flavor from the same place as the sandwich: bacon, lettuce, and tomato.  Rounded out with mayo, a hint of lemon juice, and some green onions, this dish was a huge hit with everyone at the party - so much so that I plan on making it for the wedding too!

Click the title for the recipe!
I didn't know this to begin with, but I had to hand-make whipped cream for this dish.  Perhaps if I thought it out a bit more beforehand, I may have just gone with store-bought whipped cream to save me some time, but the stuff from scratch was incredible.  This dessert is made from layers of cake cubes and cream cheese whipped cream frosting.  Topped with fresh strawberries and blueberries, this was a perfect holiday treat!

Click the title for the recipe!
These brownies were so rich and chocolatey!  The cherry cola flavor was just enough - not too much, but just a hint.  The kids all seemed to love them and the pan was completely empty by the end of the night.  I would definitely make these again - especially because the frosting was not as hard to make as I had thought it was going to be.

Happy Independence Day!
-C

Tuesday, July 2, 2013

Wedding on a Budget: Getting Organized


I'm sure there are plenty of people in the world who don't care about having things organized.  They're totally fine with things being in piles here or there or just setting things down wherever.  I am not one of those people.  Don't get me wrong, I do have a messy side - especially when it comes to clothes (mine are all over the place) and dishes (I hate doing them).  But, I like to know where things are when I need them.  And, with something as important as the wedding, I have to be organized.


That's why I created my wedding binder.  It keeps all the info I need in one place and is easily put into my laptop bag or backpack and taken along with me when I need it.  If I need a phone number for the venue's building manager or the DJ's, or need to confirm the date of a fitting or hair trial run, I have it right there at my fingertips.  No matter how badly I stress, even on the big day, all the information will be right there in one place easy for anyone to find - even if I'm busy doing something else.


I created custom printable pages - I love making custom organization printables which you will see more of (someday when I find the time) in my home management binder and kitchen organization binder.  I made a contact sheet for the wedding party for my binder and will also distribute copies to each of the party members the week before the big day.  I also included monthly calendars for each month leading up to the wedding to keep track of meetings, due dates, and appointments.


I have a very specific vision of how I want the venue to look for both the ceremony and the reception.  I've had friends and family who are helping out ask me, "how many centerpieces do you need?" or "where is the DJ going to set up?"  I addressed these questions by drawing out very rough sketches of my ideas (Don't judge me - I'm no artist!  Even stick people are a challenge for me!).  Because we're having the reception and ceremony in the same venue, we have a very special challenge ahead of us.  During dinner, while the guests are downstairs eating, drinking, and being merry, the upstairs (where the ceremony was held) will need to be transformed into a dance floor with a few seats, as well as having the DJ set up.  This is one of the biggest reasons why I made the sketches - so someone else can see my idea and carry it out while I'm enjoying newly wedded bliss.

I printed out copies of the invitations (I personally designed, printed, and trimmed each one), our wedding app posters (that'll be another post...), and the program and added them to the book for color and style comparisons (and also just to show them off a bit - I'm really very proud that I designed them all myself).  My binder is also home to a simple pocket folder and a spiral notebook.  The folder stores any and all vendor worksheets and receipts.  I like to keep the spiral notebook with everything else in case I need to jot down a few notes and am away from my computer.  Of course the binder, notebook, and folder are all in our wedding colors.  As well as being organized, I like to color coordinate.

I'll be adding to the binder as time goes on and I find more information that I'll need to keep track of.  One thing that I know I'm going to make and add to the binder: a day of itinerary, which I will (again) distribute to all VIP's a couple days before the wedding.  How did you organize your wedding planning ideas?  What would you suggest that I add to my wedding binder?  I love hearing from you - let me know your ideas in the comments!

-C


Sunday, June 30, 2013

Wedding on a Budget: The Beginning!


Maybe you know, maybe you don't, but Matt and I will be getting married this coming fall.  This is one of the main reasons that I haven't been posting anything in a while: I've just been so busy.  Planning a wedding (in under 6 months might I add) plus trying to finish up my degree (I'll graduate one week before the wedding) and working my awesome internship have left me with very little time to spare.  But, my crazy life can be your inspiration! I'm going to be presenting a wedding planning series called Wedding on a Budget (super catchy title, huh?).  I'll be sharing with you how I put together a fabulous wedding on a tight budget.


The first thought that came to my mind when we decided that we were finally going to plan a wedding for this year was: "where do I start?"  I was completely overwhelmed by the sheer amount of decisions I had to make.  Thus, being the nerdy girl I am, I took to Google and searched high and low for something that would help keep me on track and remind me of what needed to be done and when.  That's when I found The Knot.  This site has been a lifesaver to me.  It includes several planning tools such as a budgeter, guest list manager, and a checklist, all of which are accessible for free just for signing up on the site.  The checklist has been the best tool I have encountered for it's purpose.  It provides a timeline of "to do" items for planning a wedding so you won't forget a thing.  It's even customizable - you can delete tasks that you don't need and add custom tasks that aren't already included.  It has really kept me on track and on budget.


Speaking of budget - ours is small.  We've been cutting costs by doing a lot of things ourselves or with the help of our amazing and generous friends and family.  Most of the decorations are DIY projects that I'm working on myself, with the help of lots of other crafty ladies that love me!  The food is going to be home-made, cutting out the expense for catering.  The reception and ceremony will be held at the same place, eliminating the costs of bridal party transportation and a second rental fee on another venue.  We've had to come up with plenty of creative ways to conserve cash while planning this wedding, but I firmly believe that my wedding isn't going to be any less fabulous than even the most extravagant or big-budget weddings - I've just had to think out-of-the-box.


I'm so excited to share my journey with all of you.  I'll be posting about all sorts of topics throughout my planning process - including tutorials for some of my crafty decoration projects and recipes that I'm using - as well as posting more often.

-C

Monday, November 26, 2012

Olive Garden Imitation Meal

I love the Olive Garden.

Really, it could be considered an obsession.  But honestly, how can you not love it.  The unending supply of buttery bread sticks, the yummy scent of garlic in the air, white chocolate raspberry cheesecake.... delicious! 

There is only one part of my Olive Garden meal that I truly dislike - the bill!  I worked as a hostess at my local Olive Garden a few years back when I had just graduated from high school.  The only thing I liked as much as the food was the discount I received on my meals while I was employed there!  These days, I get to pay full price for my trips to the OG.  While I do love splurging on a nice meal every now and then, it's just not financially possible to eat there as much as I'd like (which could possibly be every day)!

By Saturday, Matt and I were both so tired of eating Thanksgiving leftovers.  Don't get me wrong, the foodie in me loves the holiday.  But turkey and mashed potatoes for three days gets a little boring!  In the midst of my craving for an amazing Italian meal, I came to an incredible realization - I could make this myself.


Olive Garden Seafood Alfredo is my all-time favorite.  A simple Google search for "Olive Garden seafood alfredo recipe" took me to a really nice blog called Mrs. Happy Homemaker.  I followed this recipe to make the sauce for my pasta.  I left the scallops out of my recipe, being as neither Matt nor I like them (and when I order it from the restaurant, I usually pick them all out anyway) which also helped save a buck or two at the grocery store when getting all the ingredients for this meal.  And of course, what good would an Olive Garden imitation meal be without bread sticks?  Following a Good Morning America recipe exactly (as this was my first time making bread from scratch) I made what I'd like to think are a pretty good replica of the Italian chain's bread sticks.

In total, I spent about $30 at the grocery store for this meal.  This may sound pricey, but there are some important factors to think about when shopping for your ingredients.  Firstly, I had to purchase some items that many people have on hand in their kitchens already (such as bread flour, olive oil, and active dry yeast). Secondly, some things shouldn't be skimped on.  Buying fresh (not frozen) shrimp was a bit more expensive, but I prefer working with fresh seafood and I feel that it really makes a difference in the flavor.  If you prefer to tighten your budget, frozen seafood would do just fine.  Finally, These recipes make a lot of food.  I'd say you'd be safe making this meal for a family of four at least.  We had tons of leftover pasta and sauce, which you can also use to dip your bread sticks into (which I highly recommend doing).

All in all, this meal was a HUGE success.  This was my first time making anything from scratch, and I couldn't be happier with how it all turned out.  The bread sticks tasted just like the ones from the restaurant, mine were just slightly fatter!  And the pasta sauce was incredible.  Not exactly like what you would get from the restaurant, but to be completely honest, I may have liked this better.  After all, the recipe does say "Better than Olive Garden seafood alfredo."  I'll definitely be saving these recipes and making them again.

What restaurant recipe would you copy if you could?
I'd like to try my hand at making an imitation of Raising Cane's dipping sauce.

xoxo,
C

Thursday, November 1, 2012

My Halloween Costume: Done!

Halloween was a success!


My costume turned out great, especially after putting it all together (Including elf ears and healthstones)!


We only had a few trick-or-treaters, which was surprising considering the amount of kids that are usually running around the neighborhood!  But, that just left more candy for us!

Now that's over and done with, the Holidays will be upon us before we know it!  Time to think about Thanksgiving, homemade gifts, pumpkin pies, snowflakes, and best of all.... Christmas music!
I told myself I'm not playing Christmas music at home/in the car until the day after Thanksgiving... we'll see how long that lasts!

Speaking of Black Friday, I think this will be the first year since high school that I don't have to work on this day!  I'm planning my shopping spree as I type.

I'll be making homemade gifts again this year.  I have a Pintrest board dedicated to my gift ideas!  It's not very populated yet, but as the holidays get closer, I'm sure the board will be packed full of ideas!  Check it out for your own inspiration!

xoxo,
-C

Wednesday, October 31, 2012

Halloween DIY: Armor

As you may (or may not) already know, this Halloween my costume is inspired by World of Warcraft - warlocks in particular.  Last time, I showed you how to make a fantasy inspired staff, which was the first part of the costume that was actually finished.

What's an RPG character without armor?!
Dead, that's what.

But seriously, this part in the costume making process took the most time and effort.

I would NOT suggest taking this project on if you don't have the time to go through with it because you will not be happy with the results.  Take your time with this and it can turn out very cool.


For this project you will need:
- 2-3 cans of spray foam insulation (the kind that you'd use to fill cracks outdoors - I'd recommend getting the kind that expands to the largest size you can find)
- Cardboard
- A hot glue gun (and glue sticks, of course - you will need a lot of these)
- a razor knife (I'll include a picture of the ones we used - not quite sure what else to call them)
- a sharp and sturdy pair of scissors (or knife)
- Scotch tape
- regular paper (I used the lined kind from out of a notebook - but any paper you can draw on will work)
- newspaper (and lots of it!)
-lots of white glue (like Elmer's school glue) - we used about 4 bottles
- spray paint (ours is left over from the staff project, and therefore makes the armor match the weapon)
- time, patience, and imagination!

The first step is to figure out what you want the armor to look like.  Once the general design has been worked out, draw it to scale to fit your own body on the plain paper.  This step can take a lot of measuring and trial and error - Be patient, it will work out!


Once you have the pieces drawn to scale, cut them out of the paper.  The pieces you see here are what is going to make up the shoulder armor.  You only need to cut out each piece one time and trace them as many times as needed, this way all the pieces that are supposed to be the same will be identical.


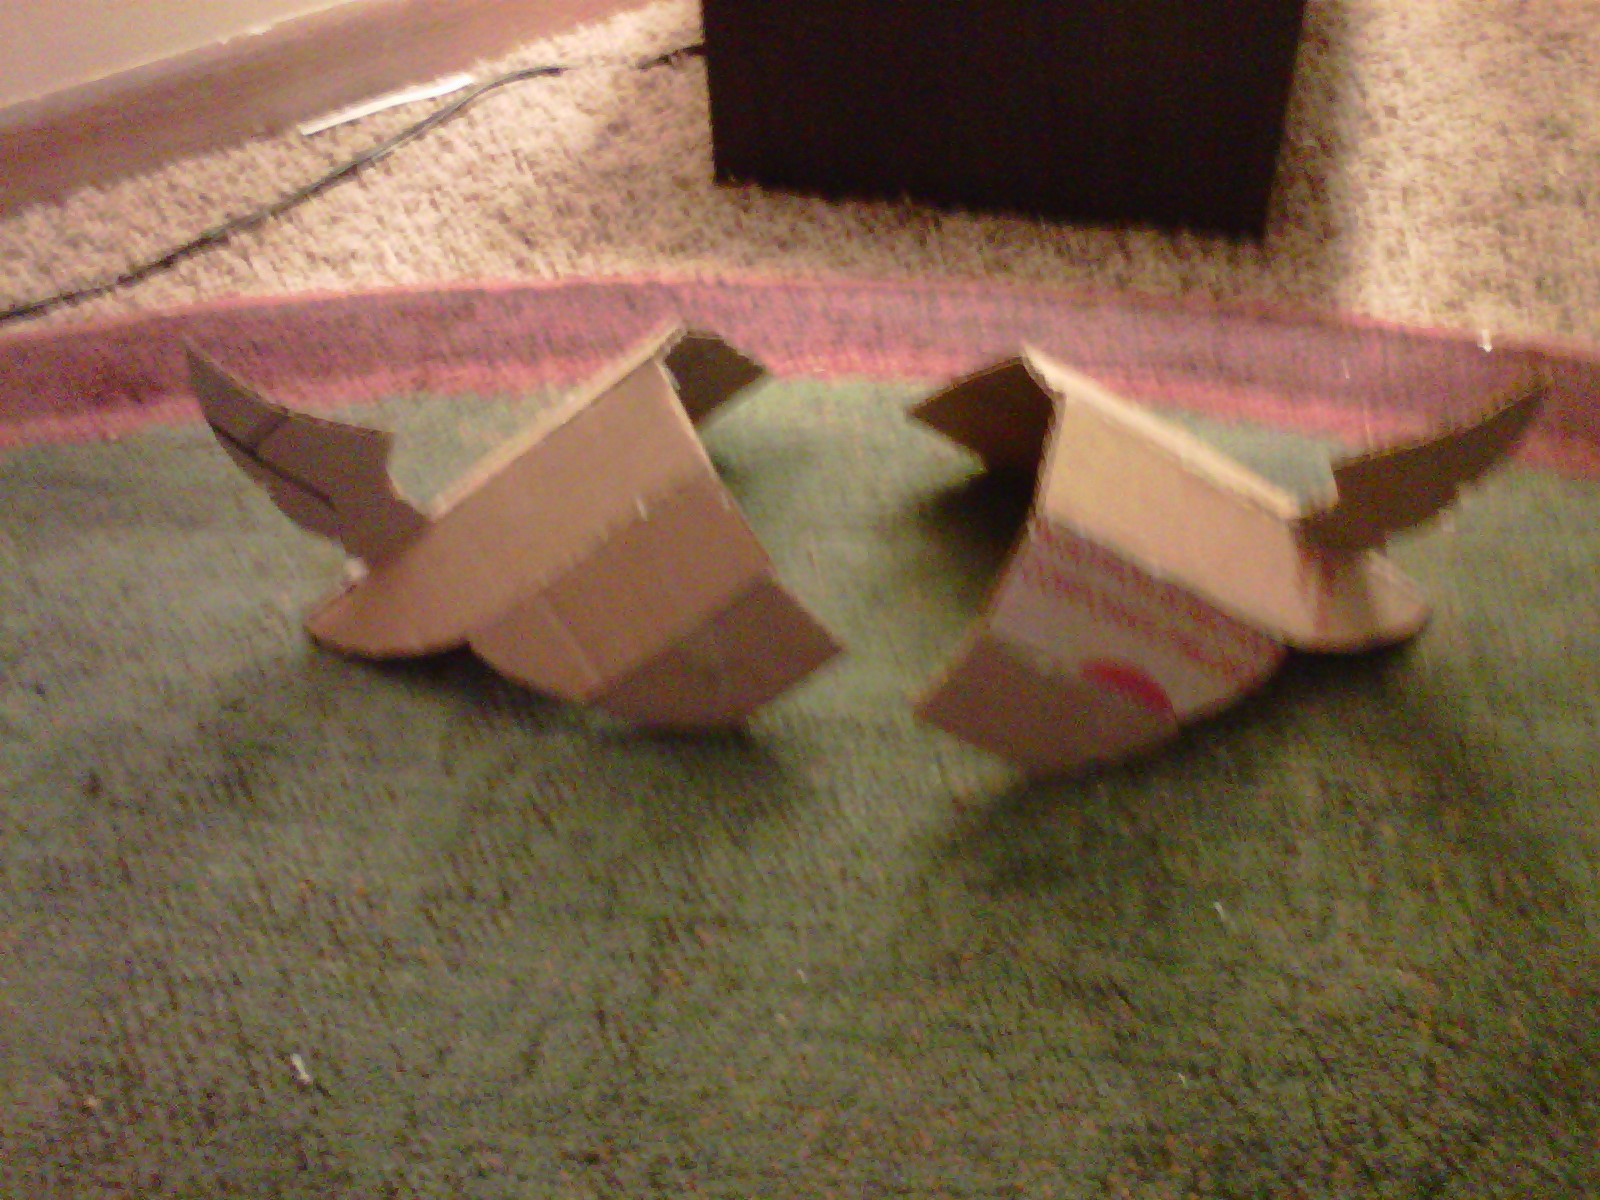
Place the paper shapes on the cardboard and trace them.  I traced four of most of the shapes (making the front and back of the shoulder pieces identical, as well as the two pieces of armor being identical themselves).  The "wing" shape you see at the bottom was a really great idea I had, but didn't turn out as I wanted - but Matt helped me save that idea... more on that in a bit.  Cut the shapes out of the cardboard using the sturdy/sharp scissors or a knife.


Once you have all the pieces of cardboard cut out, fit the pieces to your body and use the Scotch tape to hold the pieces at the right angles once you have figured out the way you'd like it to look.


After you have the angles all figured out, use the hot glue gun to fix the pieces together.  


You will end up with cardboard mockups of what your armor will look like when you're done.  Don't worry about any words or stickers that may be showing on the outside of your pieces, they won't show when you're done.  As I'm sure you can tell, the piece on the left is the breastplate, complete with awesome fake abs :)


The next step in the process (once the hot glue is dry - which takes only a matter of minutes) is to cover the entire thing with the spray foam.  Make sure you get the WHOLE outside of the piece covered completely with no cardboard showing on the front/outside.


This part of the process was simultaneously the most fun and most frustrating.  I found out some tricks via trial and error - and I will share them with you so you don't make the same mistakes!

  1. The foam won't expand a whole lot bigger than it does when it comes out of the can, so really make sure everything is completely covered.
  2. Follow the directions on the can of foam exactly - when it says to shake the can for an entire minute before using it, it really means it... the foam won't expand right if you don't.
  3. Its okay to have more foam than you need on your pieces of armor.  It really beats not having enough.
  4. If you feel that a spot isn't thick enough and it has already begun to dry (even the slightest bit), let it dry completely before trying to add more foam.  I didn't do this, and the top layer of foam I added melted the bottom layer and I was left with a giant bubble in the middle of my chest piece - which I later fixed by adding more foam AFTER it dried.
Wait overnight for the foam to dry before doing anything else.  Realistically, the foam takes about 8 hours to completely dry, so you don't necessarily have to wait overnight if you're impatient (but remember, I told you patience will come in handy with this project!).  The foam will be ready to carve down once you can insert a knife into the foam and it comes out clean.


The next step is definitely the most messy.  I'd recommend doing this outdoors (or in a very well ventilated room at least) and with something like a trash sheet or tarp underneath you while you work.

Taking the razor knife (like the ones in the picture above - which we got at Harbor Freight Tools for 99 cents for a pack that came with the two different sizes), carefully carve down the dried foam so that your armor is back into its original shape.  I didn't get a photo of this step, and as I said it is very messy.  You will have tiny pieces of foam all over the place.  Make sure that there is at least 1 inch of foam left when you are done carving the pieces out.

As I said earlier, the "wing" decorations for my shoulder pieces didn't work out.  The cardboard guide that I made that was inside of all that foam wasn't sturdy enough for the razor knife and I sliced right through it without realizing until it was too late.  Matt saved the day (I was pretty upset at this point) by carving the foam out to look like curved horns instead, which ended up looking really cool.

When you have the general shape of your armor carved out, you can carve out details.  I re-drew the lines for the "fake abs" on the front of the foam on my chest piece with a Sharpie, and carved them down as well. Don't be afraid to make them fairly pronounced, they'll get covered up in a bit.


Once you're happy with the shape of your armor and have carved in any details you'd like, it's time to paper mache.  I had never done this before, and I felt like a kid again doing it.  We mixed the glue with water at a 1:1 ratio.  If you're using a thinner brand (pretty much anything that's not Elmer's) use a 3/4 glue to 1/2 water ratio.  This step will also be messy. We covered the entire work area (a.k.a. the living room floor) with newspaper first and then put down some cardboard on top, just for good measure.

Tear the newspaper into strips 1 inch thick.  The length depends on the piece that you're covering, but try not to make them too long or you lose some of the detail that working with smaller pieces offers.  Dip the entire piece of newspaper into the glue mix and wring it out with your fingers (I told you it would be messy!).  Place the pieces of newspaper onto the armor, making sure you are covering any edges as well, until the armor is completely covered.  Wait about an hour for the glue to be tacky-dry and apply another coat of paper mache and let dry overnight.


The next step (the most fun, in my opinion) is painting.  Make sure you get each piece covered well enough that someone can't read the headline of yesterday's news on your armor.  I had to use three coats of spray paint to get rid of Marmaduke's face on my chest piece.  The black obviously covered a bit better... the only color I really had to coat on was the red.

Once the base coat of your armor is dry, you can paint on any details you'd like.  I'd recommend getting acrylic paints for this part, but me being the thrifty (and lazy) girl that I am, I simply sprayed a good amount of gold spray paint onto a small piece of cardboard (in one small spot) and dipped my paintbrush in that.  This method forces you to work a bit more quickly than I'd imagine you'd have to with acrylic paint as the spray paint dries faster, but it worked out well as you can see from the first picture in this post.

And Voila!  You have your very own set of armor.

***DISCLAIMER****
this armor won't actually protect you from swords or magic spells.

As tonight is Halloween, I'll finally be getting dressed up in the completed costume.  I can't wait to see how it looks all put together!

But, that's a post for next time ;)

xoxo
-C