- I love to make/decorate stuff.
- I am cheap... or "thrifty" might be a nicer word :)
This year for Christmas, I decided to go the homemade route. It is so special to see someone really enjoy a gift that you worked hard (or didn't work too hard) to make yourself! I got the idea from one of my favorite bloggers, Kandee Johnson - actually where I get a lot of my ideas!
MUSTACHE MUGS!!!

How cute is that?! Mustaches are a really fun and quirky trend right now, and how much fun is it that when you sip from the mug, you are graced with a glorious handlebar mustache?! Painting ceramics is always a creative and unique way to give a gift. And, who doesn't love to save a buck or two? Especially around the holiday season, when expenses can sometimes be a little overwhelming! I found these mugs at the dollar store, so I paid a whopping $8.00 for the mugs, and I now have gifts for 8 people checked off my list!
All you need to start making these bad boys:


To go with the mustache mugs, I also made hot chocolate mix to give with it.
All you need to start making these bad boys:
- Ceramic mugs (got mine for $1.00 each at Dollar Tree)
- A pair of scissors
- Some tape (I would recommend using regular Scotch tape, but I think masking tape would work too-just don't use something heavy duty like packaging or duct tape)
- Ceramic paint (I used FolkArt Enamels Acrylic Paint for Glass & Ceramics in color 4032 Licorice) MAKE SURE that you are using paint specifically for ceramics and that the paint can be set in order to make it dishwasher safe. I got the bottle at Michael's Craft Store, for about $4 or $5.
- Mustache stencil - Kandee's blog has a free downloadable image that can be used as a stencil, but I didn't have ink in my printer, so I drew mine by hand, using her's a reference. Mine measures 4" across.
- Paint brushes (If you are able to get a ceramic paint pen, then you don't need the brushes obviously, but my store didn't have any paint pens, so I had to go with the brushes.) I used a sponge dotter on the stencil, and then used a fine brush to make touch-ups.
HOW TO MAKE THEM:

Make sure your mugs are clean and dry BEFORE you start. - If you start with dirty mugs, the paint will have a hard time adhering to the ceramic.

Cut out your stencil and trim down the sides so that it will fit nicely onto the rim of the mug.

Line up the stencil on the mug (with the handle on the left for a right hander, on the right for a lefty.) and tape down to prevent it from moving.

Apply the paint to the stencil - I dotted the paint with the sponge and it gave the image a bit of a textured look that is neat.

Let dry just a minute, so the paint isn't disturbed when you remove the stencil, and then remove the tape and lift stencil off gently.
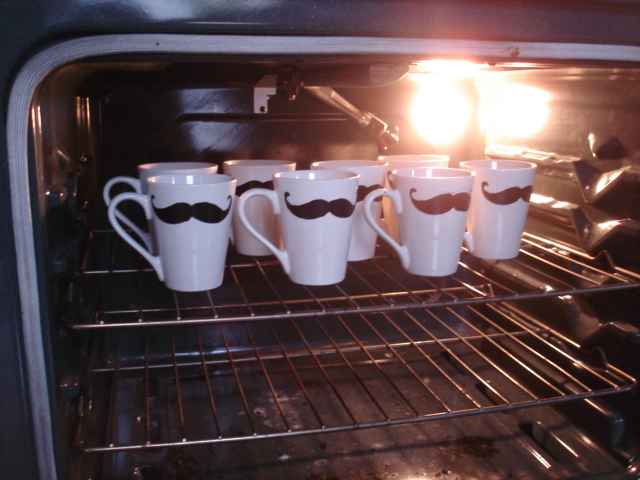
Go over any rough edges or lighter spots with a fine paintbrush. As per the instructions on the paint, I let mine air dry 1 hour before baking them to set the paint.
Happy holidays <3
