As you may (or may not) already know, this Halloween my costume is inspired by World of Warcraft - warlocks in particular. Last time, I showed you how to make a fantasy inspired staff, which was the first part of the costume that was actually finished.
What's an RPG character without armor?!
Dead, that's what.
But seriously, this part in the costume making process took the most time and effort.
I would NOT suggest taking this project on if you don't have the time to go through with it because you will not be happy with the results. Take your time with this and it can turn out very cool.

For this project you will need:
- 2-3 cans of spray foam insulation (the kind that you'd use to fill cracks outdoors - I'd recommend getting the kind that expands to the largest size you can find)
- Cardboard
- A hot glue gun (and glue sticks, of course - you will need a lot of these)
- a razor knife (I'll include a picture of the ones we used - not quite sure what else to call them)
- a sharp and sturdy pair of scissors (or knife)
- Scotch tape
- Scotch tape
- regular paper (I used the lined kind from out of a notebook - but any paper you can draw on will work)
- newspaper (and lots of it!)
-lots of white glue (like Elmer's school glue) - we used about 4 bottles
- spray paint (ours is left over from the staff project, and therefore makes the armor match the weapon)
- time, patience, and imagination!
The first step is to figure out what you want the armor to look like. Once the general design has been worked out, draw it to scale to fit your own body on the plain paper. This step can take a lot of measuring and trial and error - Be patient, it will work out!

Once you have the pieces drawn to scale, cut them out of the paper. The pieces you see here are what is going to make up the shoulder armor. You only need to cut out each piece one time and trace them as many times as needed, this way all the pieces that are supposed to be the same will be identical.

Place the paper shapes on the cardboard and trace them. I traced four of most of the shapes (making the front and back of the shoulder pieces identical, as well as the two pieces of armor being identical themselves). The "wing" shape you see at the bottom was a really great idea I had, but didn't turn out as I wanted - but Matt helped me save that idea... more on that in a bit. Cut the shapes out of the cardboard using the sturdy/sharp scissors or a knife.

Once you have all the pieces of cardboard cut out, fit the pieces to your body and use the Scotch tape to hold the pieces at the right angles once you have figured out the way you'd like it to look.

After you have the angles all figured out, use the hot glue gun to fix the pieces together.

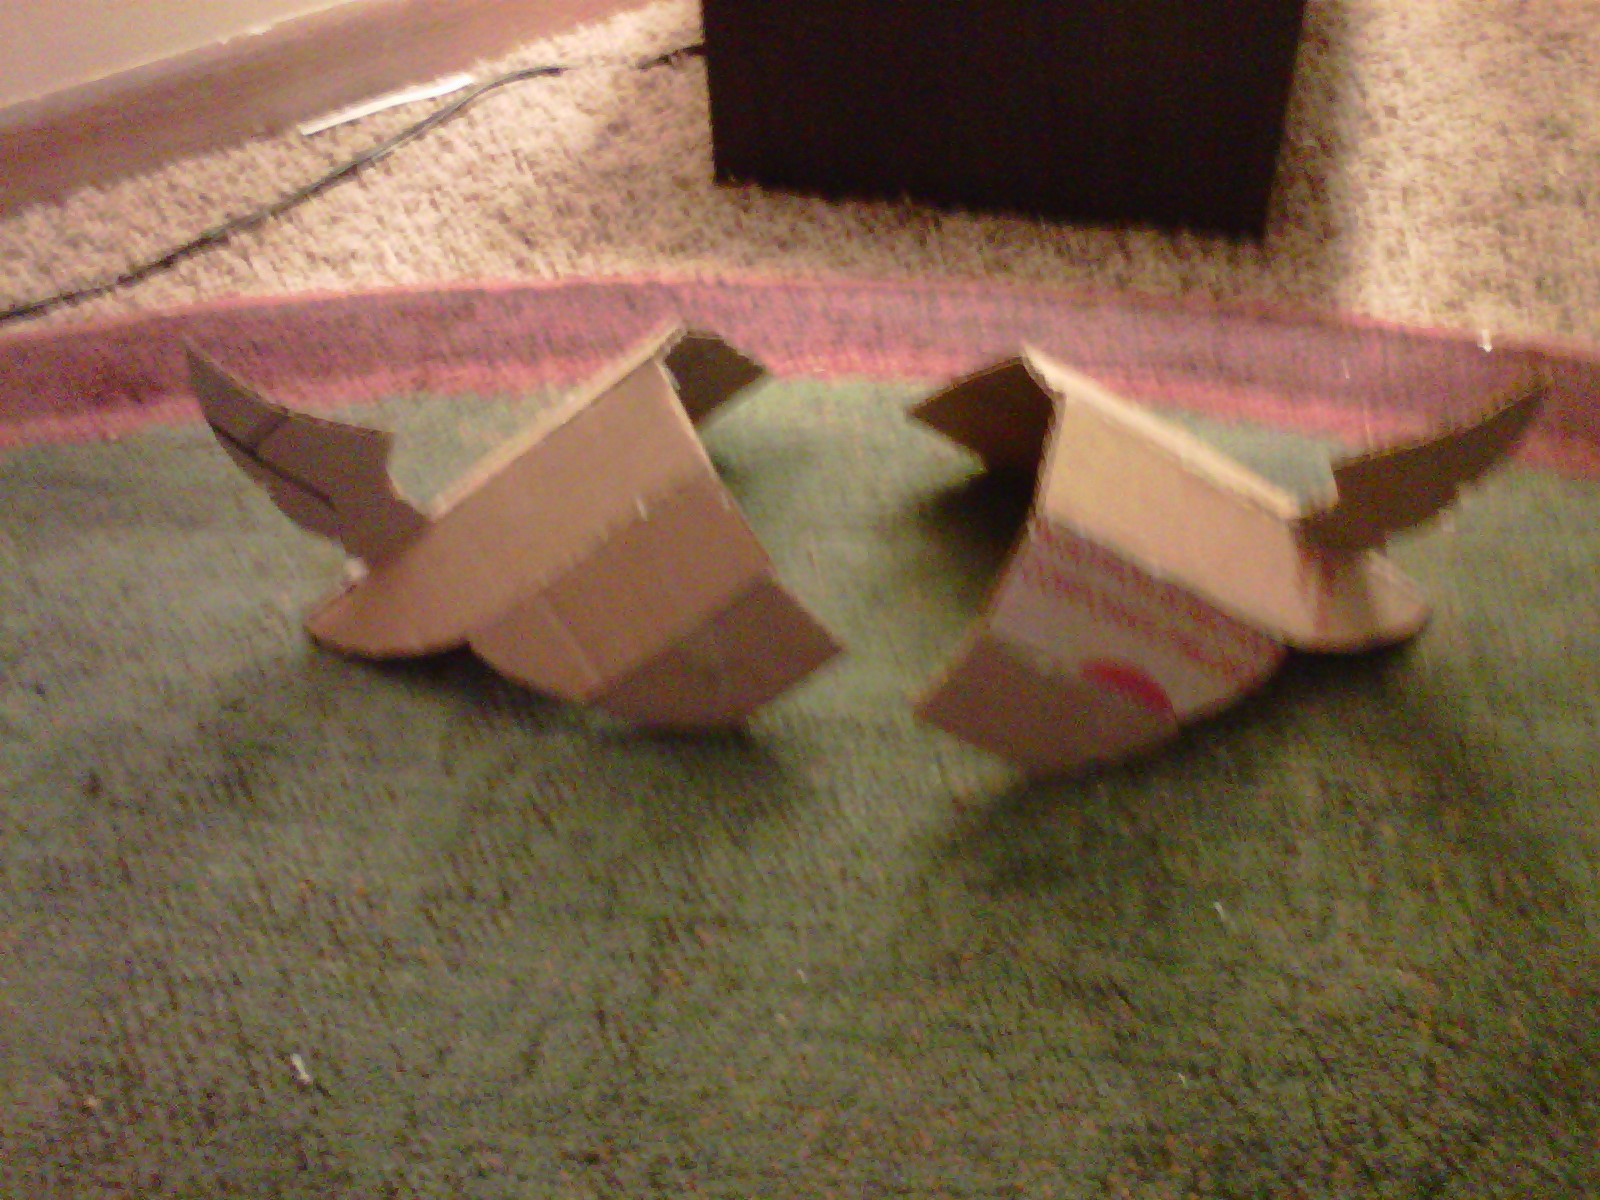
You will end up with cardboard mockups of what your armor will look like when you're done. Don't worry about any words or stickers that may be showing on the outside of your pieces, they won't show when you're done. As I'm sure you can tell, the piece on the left is the breastplate, complete with awesome fake abs :)

The next step in the process (once the hot glue is dry - which takes only a matter of minutes) is to cover the entire thing with the spray foam. Make sure you get the WHOLE outside of the piece covered completely with no cardboard showing on the front/outside.

- The foam won't expand a whole lot bigger than it does when it comes out of the can, so really make sure everything is completely covered.
- Follow the directions on the can of foam exactly - when it says to shake the can for an entire minute before using it, it really means it... the foam won't expand right if you don't.
- Its okay to have more foam than you need on your pieces of armor. It really beats not having enough.
- If you feel that a spot isn't thick enough and it has already begun to dry (even the slightest bit), let it dry completely before trying to add more foam. I didn't do this, and the top layer of foam I added melted the bottom layer and I was left with a giant bubble in the middle of my chest piece - which I later fixed by adding more foam AFTER it dried.
Wait overnight for the foam to dry before doing anything else. Realistically, the foam takes about 8 hours to completely dry, so you don't necessarily have to wait overnight if you're impatient (but remember, I told you patience will come in handy with this project!). The foam will be ready to carve down once you can insert a knife into the foam and it comes out clean.

The next step is definitely the most messy. I'd recommend doing this outdoors (or in a very well ventilated room at least) and with something like a trash sheet or tarp underneath you while you work.
Taking the razor knife (like the ones in the picture above - which we got at Harbor Freight Tools for 99 cents for a pack that came with the two different sizes), carefully carve down the dried foam so that your armor is back into its original shape. I didn't get a photo of this step, and as I said it is very messy. You will have tiny pieces of foam all over the place. Make sure that there is at least 1 inch of foam left when you are done carving the pieces out.
As I said earlier, the "wing" decorations for my shoulder pieces didn't work out. The cardboard guide that I made that was inside of all that foam wasn't sturdy enough for the razor knife and I sliced right through it without realizing until it was too late. Matt saved the day (I was pretty upset at this point) by carving the foam out to look like curved horns instead, which ended up looking really cool.
When you have the general shape of your armor carved out, you can carve out details. I re-drew the lines for the "fake abs" on the front of the foam on my chest piece with a Sharpie, and carved them down as well. Don't be afraid to make them fairly pronounced, they'll get covered up in a bit.

Once you're happy with the shape of your armor and have carved in any details you'd like, it's time to paper mache. I had never done this before, and I felt like a kid again doing it. We mixed the glue with water at a 1:1 ratio. If you're using a thinner brand (pretty much anything that's not Elmer's) use a 3/4 glue to 1/2 water ratio. This step will also be messy. We covered the entire work area (a.k.a. the living room floor) with newspaper first and then put down some cardboard on top, just for good measure.
Tear the newspaper into strips 1 inch thick. The length depends on the piece that you're covering, but try not to make them too long or you lose some of the detail that working with smaller pieces offers. Dip the entire piece of newspaper into the glue mix and wring it out with your fingers (I told you it would be messy!). Place the pieces of newspaper onto the armor, making sure you are covering any edges as well, until the armor is completely covered. Wait about an hour for the glue to be tacky-dry and apply another coat of paper mache and let dry overnight.

The next step (the most fun, in my opinion) is painting. Make sure you get each piece covered well enough that someone can't read the headline of yesterday's news on your armor. I had to use three coats of spray paint to get rid of Marmaduke's face on my chest piece. The black obviously covered a bit better... the only color I really had to coat on was the red.
Once the base coat of your armor is dry, you can paint on any details you'd like. I'd recommend getting acrylic paints for this part, but me being the thrifty (and lazy) girl that I am, I simply sprayed a good amount of gold spray paint onto a small piece of cardboard (in one small spot) and dipped my paintbrush in that. This method forces you to work a bit more quickly than I'd imagine you'd have to with acrylic paint as the spray paint dries faster, but it worked out well as you can see from the first picture in this post.
And Voila! You have your very own set of armor.
***DISCLAIMER****
this armor won't actually protect you from swords or magic spells.
As tonight is Halloween, I'll finally be getting dressed up in the completed costume. I can't wait to see how it looks all put together!
But, that's a post for next time ;)
xoxo
-C


